DIY Fitting of Granite Worktops
These instructions explain the installation process for granite kitchen worktops and other things you should know about solid stone worktops.
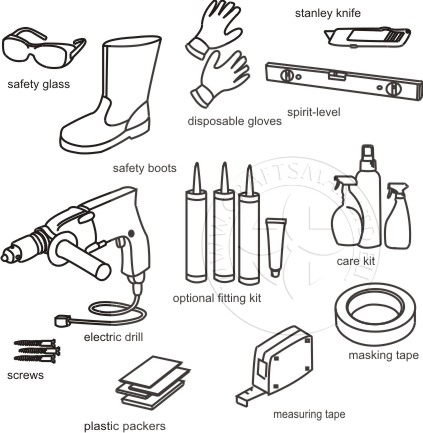
Tools and equipment recommended:
- Tape measure
- Stanley knife
- Spirit-level
- Pencil
- Masking tape
- Drill, screws, raw plugs and wooden battens to provide extra support on walls for worktops where necessary
- Safety equipment: Safety glasses, Safety lifting belt, Safety boots, Disposable gloves
- Fitting Kit (available from Craftsman Ltd) includes plastic packers or shims for levelling worktops (0.5mm, 1mm, 2mm, 3mm) and 50ml epoxy glue resin
- Hygienic clear silicone for gluing and mounting sinks (where appropriate)
- Bolts for mounting sinks (where appropriate)
- Care kit (available from Craftsman Ltd): 250ml Stone Cleaner, 250ml Stain Repellent, 250ml Stone Polish - silicone based
- Clear and/or Colour match silicone to finish off
Before fitting / installing granite / stone worktops
An average 3m stone worktops needs at least 3 people to lift safely so make sure you have the manpower available.
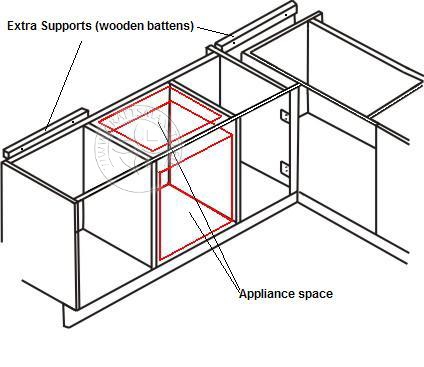
- Make sure the worktops will be properly supported: Where the worktops span spaces over kitchen appliances and carcase units or go into corners unsupported, fix wooden battens to the walls to support the worktops if necessary.
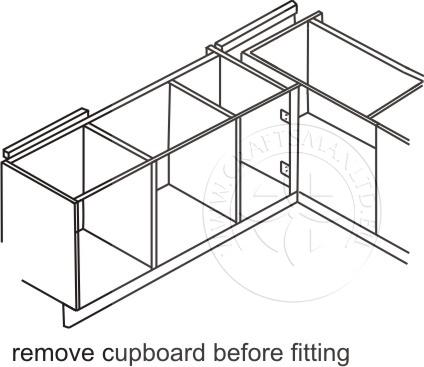
- Granite (stone) worktops are very heavy and it can be difficult to lift them in confined spaces. You should remove cupboard door fronts and any other items that may get damaged during the fitting of granite worktops.
- On some occasions, especially when granite worktop pieces are particularly large and/or cumbersome (e.g. large islands of granite worktops), it may be necessary to arrange extra people to assist in lifting and moving the stone / granite worktops into place.
- Trial fit worktops: To make sure that everything is done correctly, we recommend you trial fit the worktops first. Bring worktops to the room where they will be assembled and put all pieces in the places where they are to be fitted, but do not use any glue.
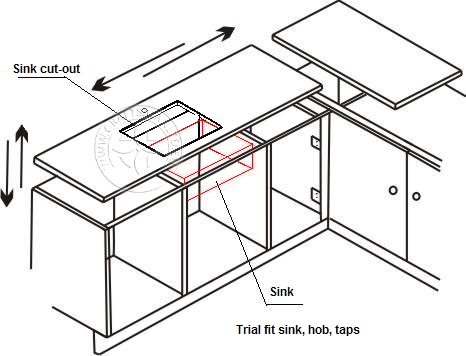
- Trial fit sink and hob: to ensure there is enough space in the base unit before you glue your worktops.
If your sink or hob is a bit too big to fit in the base unit you will need to cut away part of the base unit to allow space for the taps and sink or hob. Allow an extra 5 - 15 mm for movement. Don’t forget to allow for all the pipe work. Once you have removed the unwanted material trial fit all your pieces again.
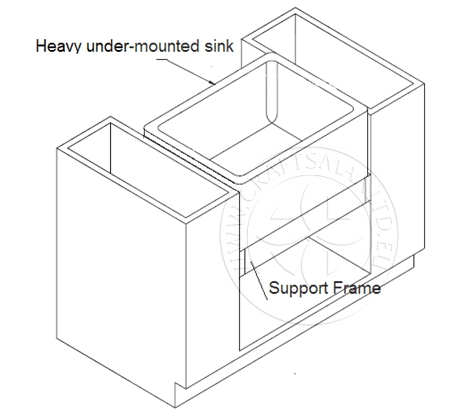
Tips for heavy under-mounted sinks (Belfast type sinks):
- To begin with, make sure you have someone to help you with lifting and fitting.
- In most cases, heavy under-mounted sinks such as enamel and stone sinks need to have a wooden frame constructed all around the sink. From our experience, building a wooden support frame is best done before fitting granite worktops. You can either make a frame around the sink (box-type wooden support frame), so the sink’s heavy weight would be supported with this frame or make a shelf within the cupboard so the sink rests on that.
Quick summary before fitting worktops:
- Make sure all stone / granite worktops will be adequately supported
- Remove cupboard fronts etc
- Arrange enough people for lifting and moving stone / granite worktops
- Trial fit stone / granite worktops
- Trial fit sink, taps and hob – ensure there is enough space in base unit
Guide fitting / installation time - medium size kitchen – worktops can be fitted in 3-4 hours.
Stone / Granite Worktop Levelling and Overhang
Levelling Worktops
- Use a long spirit level to ensure all the worktops are level.
- Many base units come with adjustable legs and you can use plastic packers or shims to level the tops.
- Ensure all joints are flush.
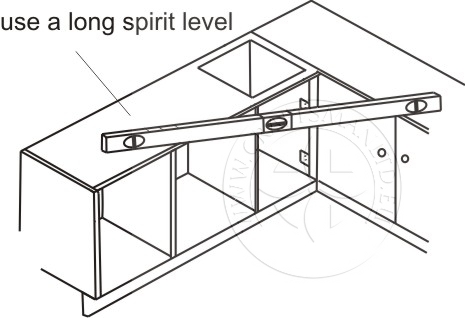
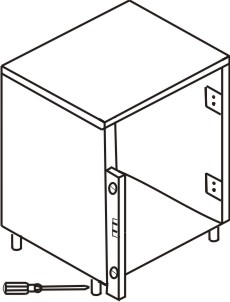
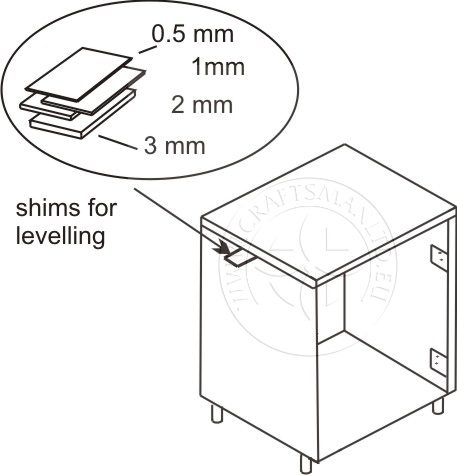
Tips to check stone / granite worktops are level:
- Use a long spirit level
- Use a stanley knife blade on the joint top to see if worktops are flush
- Use a round coin to see if worktops are level
Set stone / granite worktop overhang
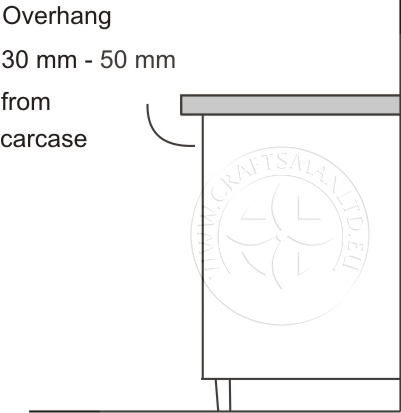
After you have placed your worktops on the units, ensure overhangs are even and 30 to 50 mm from carcase (without doors fitted).
Sinks, Hobs, Taps and Holes
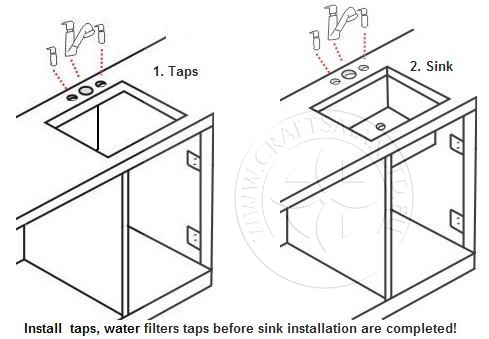
Install taps, water filter taps, and/or mixers before sink installation are completed. You will have more working space; it is much often more difficult to fit these after the sink is installed.
General installation steps for over-mounted sinks
- Thoroughly clean both the top of the worktop and the underside of the sink where they are to be glued.
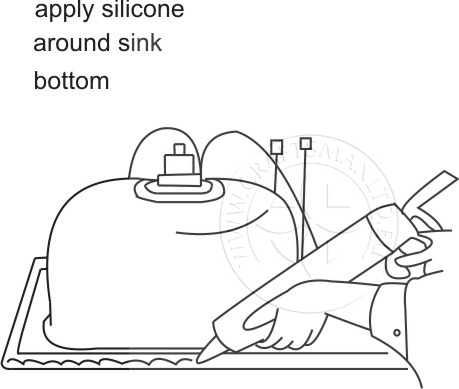
- Apply silicon (or similar) to the worktop and to the sink to ensure the best seal.
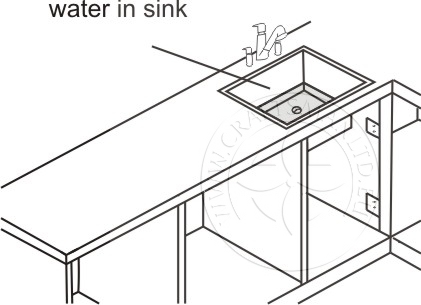
- Weight the sink down (fill with water if possible) with something heavy until the silicone is dry.
- Remove any excess silicone with a damp cloth as soon as possible (before it dries).
General installation steps for under-mounted sinks
For under-mounted sinks the cut-out dimensions have to be 10-20 mm less than the sink or the bowl inside dimensions.
Undermounted sinks usually have specially designed screw bolt brackets supplied with them. Please read the sink manufacturer’s instruction to find more detailed information but the normal process is:
- Thoroughly clean both the underside of the worktop and the top of the sink where they are to be glued.
- Apply masking tape to sink cut
- Apply silicone to the sink edge and worktop bottom around cut out
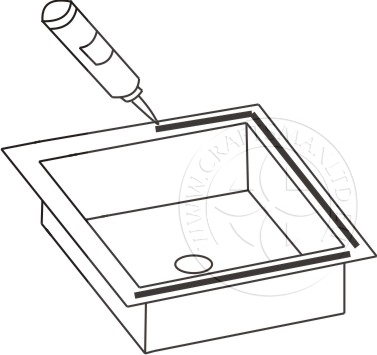
- Mount sink from the inside of the carcase unit
- Fit and tighten screw bolt brackets evenly
(Do not over- tighten bracket screw bolts as they may get bend and fall off.)
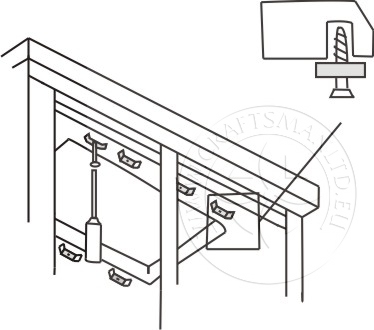
- Apply a bead of silicon between the sink and the cut-out edges
- Remove excess silicone with a damp cloth as soon as possible to make a neat watertight seal
- Remove masking tape
Hob Installation
Before you install the hob into its cut-out, you should stick a foam seal around the hob to prevent anything from getting between the worktop and hob.
Gluing Stone / Granite Worktop Joints
You will need disposal gloves, masking tape and stanley knife blade
- Mask the worktop edges on each side of the joint with a masking tape. Don't forget to mask the front edge.
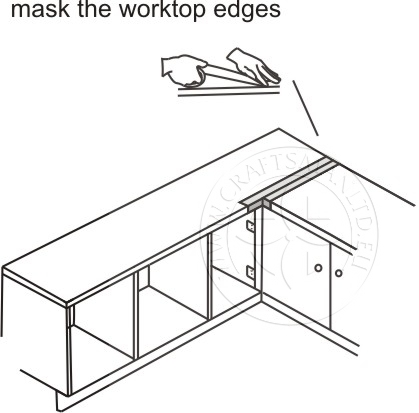
- Glue joints with two-part epoxy glue (preferably) or, silicone. Use a matching colour or clear. Apply a fine line on the joint where the worktop pieces meet. (If you are using epoxy glue, you need to add some colour pigment to the epoxy resin before you apply hardener.)
- Remove masking tape after the glue has dried. Epoxy glue normally dries out within 5 to 10 minutes.
- If necessary use a sharp stanley knife blade to remove excess dry glue or silicone
Glue Worktops and Base Units Together
Glue your worktops to your units using clear silicone running it around all edges where the units and supports touch the worktops. You should try to reach all places possible.
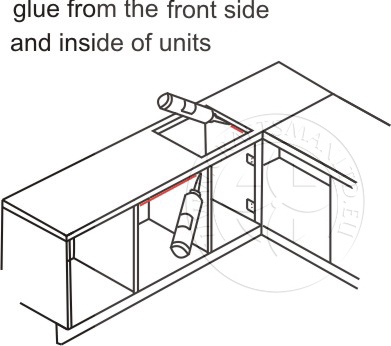
Remove excess silicon with a damp cloth as soon as possible.
Gluing and Fitting Upstands, Backsplashes and Window Sills
Trial fit first, assuming all is satisfactory
- Apply silicone on the rear side of granite piece
- Press it firmly into place
- Apply clear silicone to the edge between the worktop and the upstand, in order to make it watertight.
- Remove excess silicon with a damp cloth as soon as possible.
Fitting Granite / Stone Worktops Tip:
Walls are rarely straight or square, so small gaps between the granite worktop and the wall are to be expected. You may also need to slightly modify walls next to the granite worktop upstand and wall or tiles to minimize gaps. We therefore advise fitting a splash back, upstands or tiling after your granite worktop is fitted.
Finishing Off
Seal between the worktops and walls/upstands/tiles with low-modulus silicone.
Before You Use Your Worktops Seal Them
Clean your worktops with a suitable cleaning solution then seal (proof) them before using.
Caring for Granite Worktops
Contact Craftsman Ltd. for care kits, so you could maintain the appearance of your worktops. Our company also provides after-care service to help keep your new granite worktops looking their best.
Other related pages:
- How to choose the most suitable granite worktop for your kitchen or bathroom
- DIY Templating of Kitchen Granite Worktops
- DIY Fitting of Kitchen Granite Worktops
- DIY Goods Delivery Options


